


DIY Dollar Tree Flower
I love flowers! When spring arrives I can’t wait to start planting them. However, I live in Iowa and the rule of thumb here is that you don’t plant outdoors until after Mother’s Day. That is almost two months award !!! To add a little color to my flower pots I decided to create some flowers that would not die in the event that we get a late spring snow (knock on wood!).

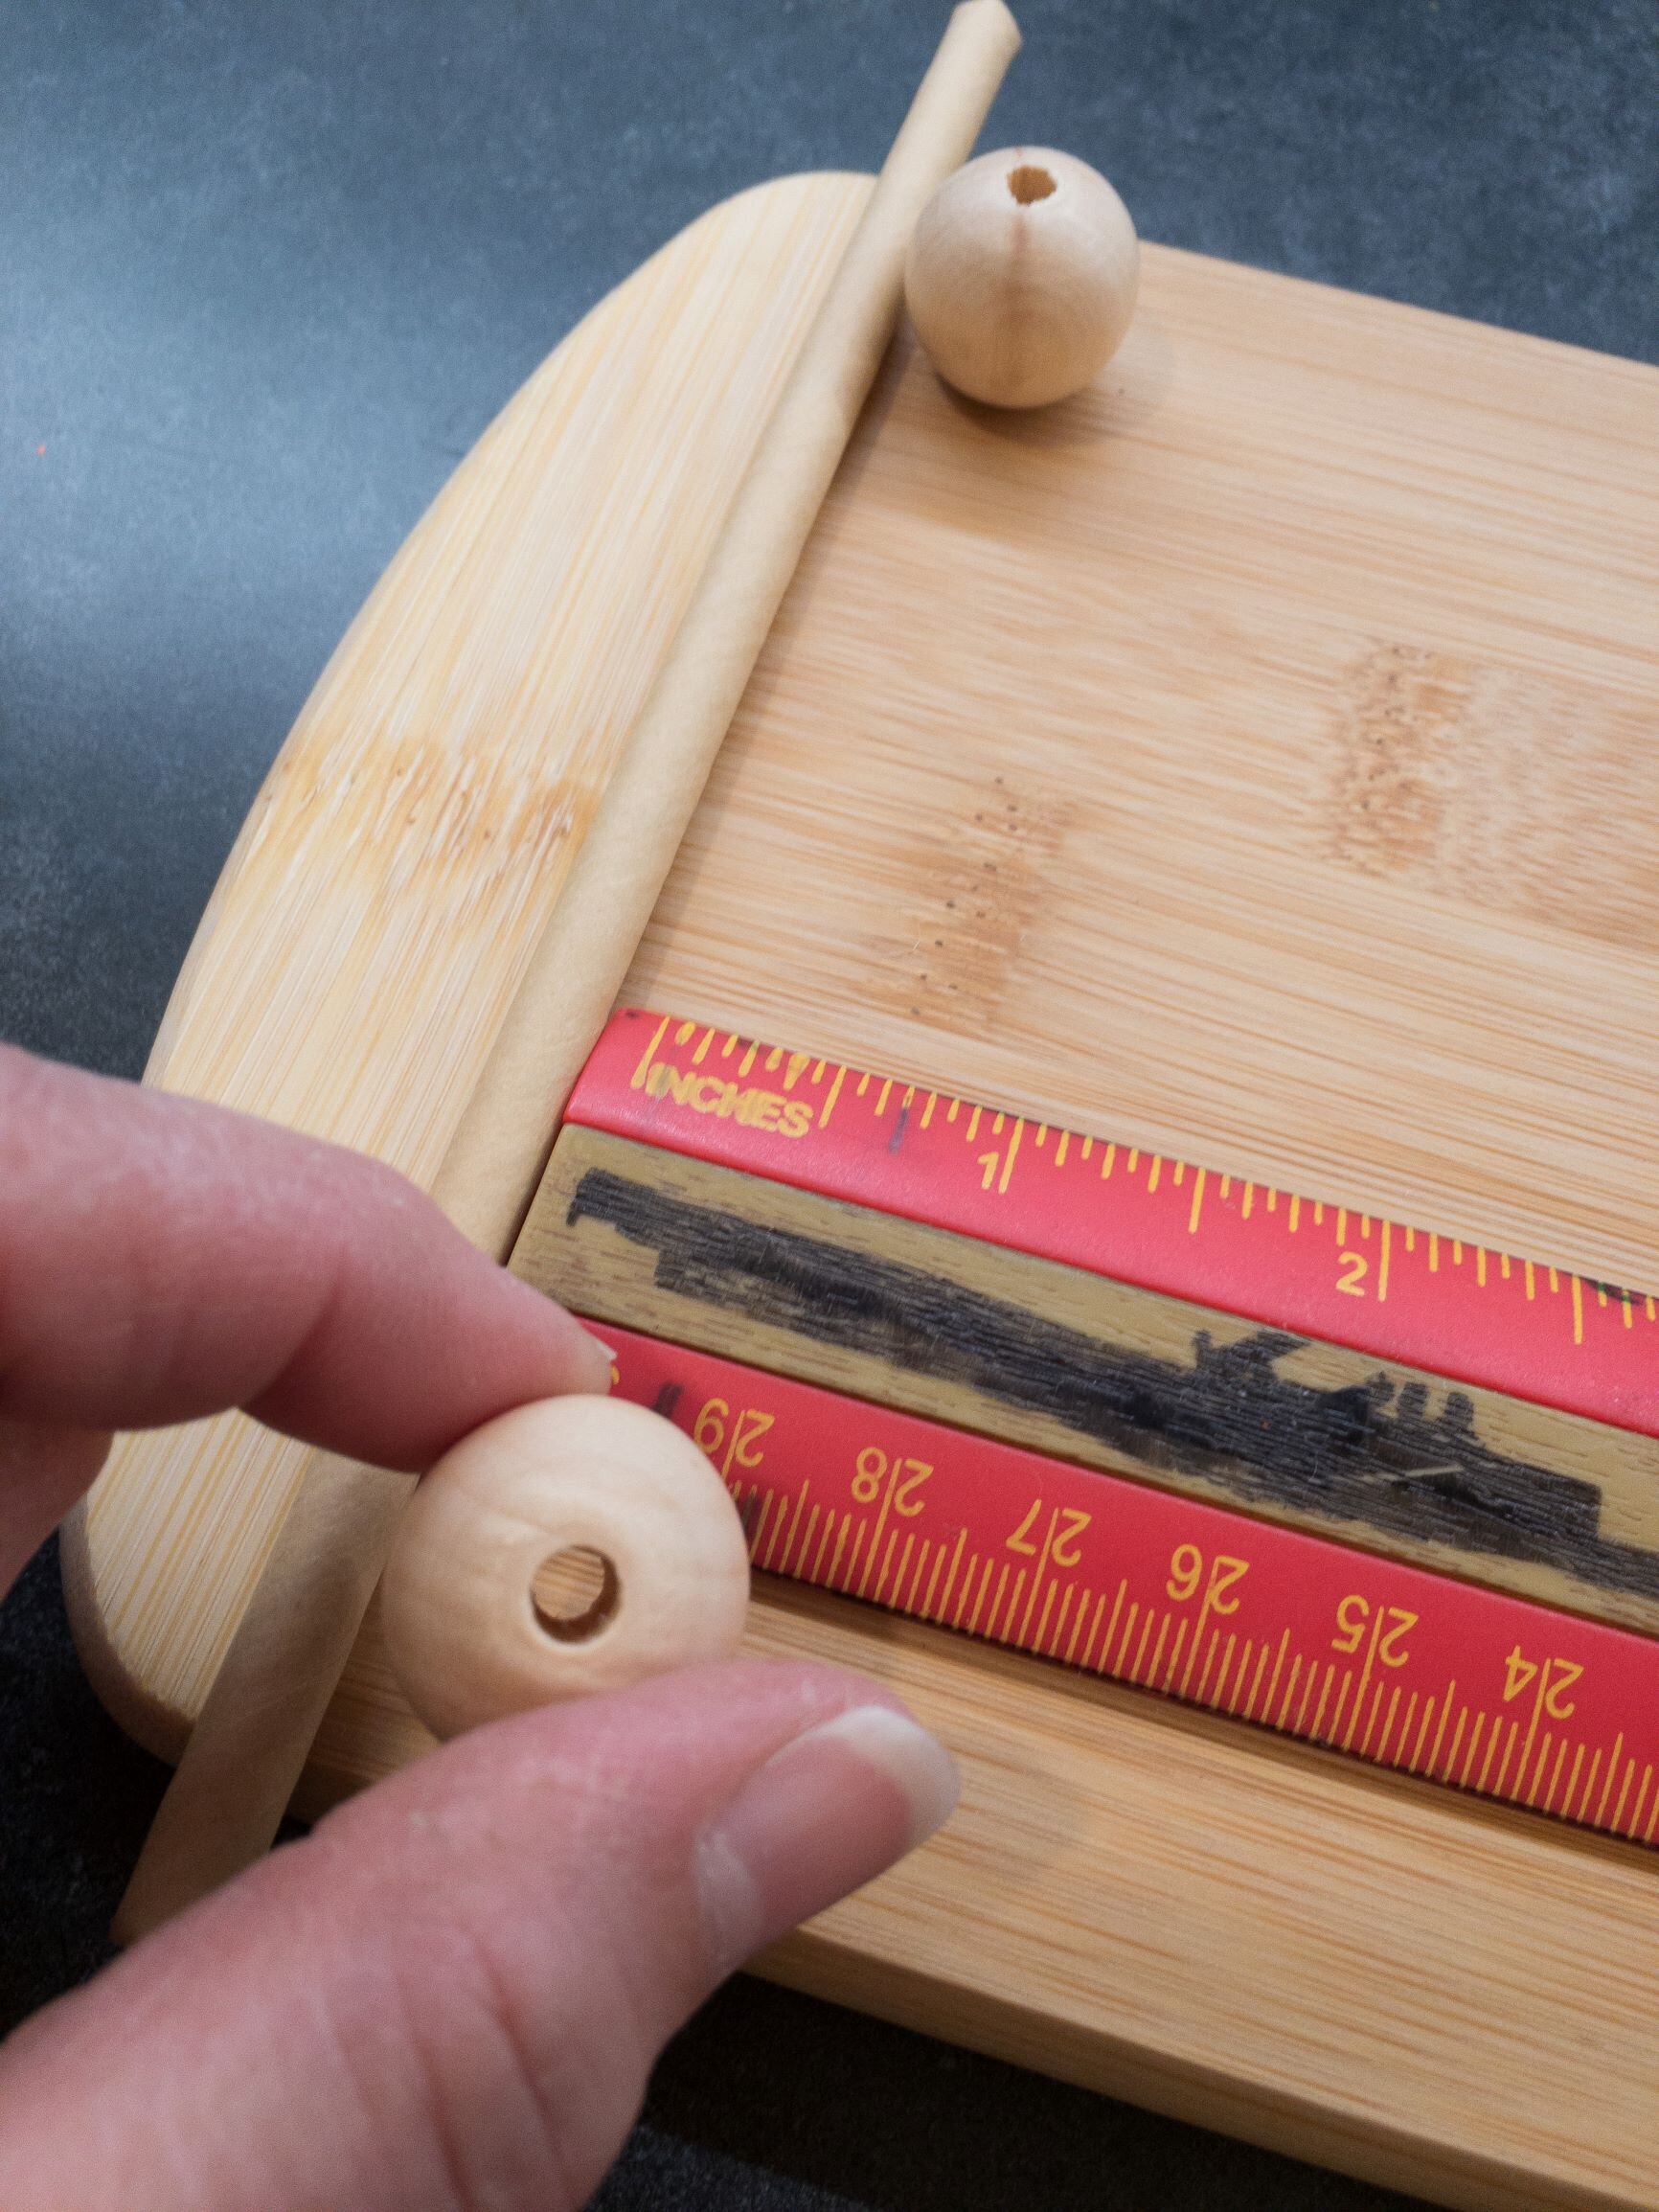
These are some of the supplies that you will need. I got these items from the Dollar Tree; clothespins, mesh strainers, and aluminum cookie sheets. I also used some things that I already had; green, yellow, and brown paint, paint brushes, small piece of burlap, two wooden dowels, and hot glue.
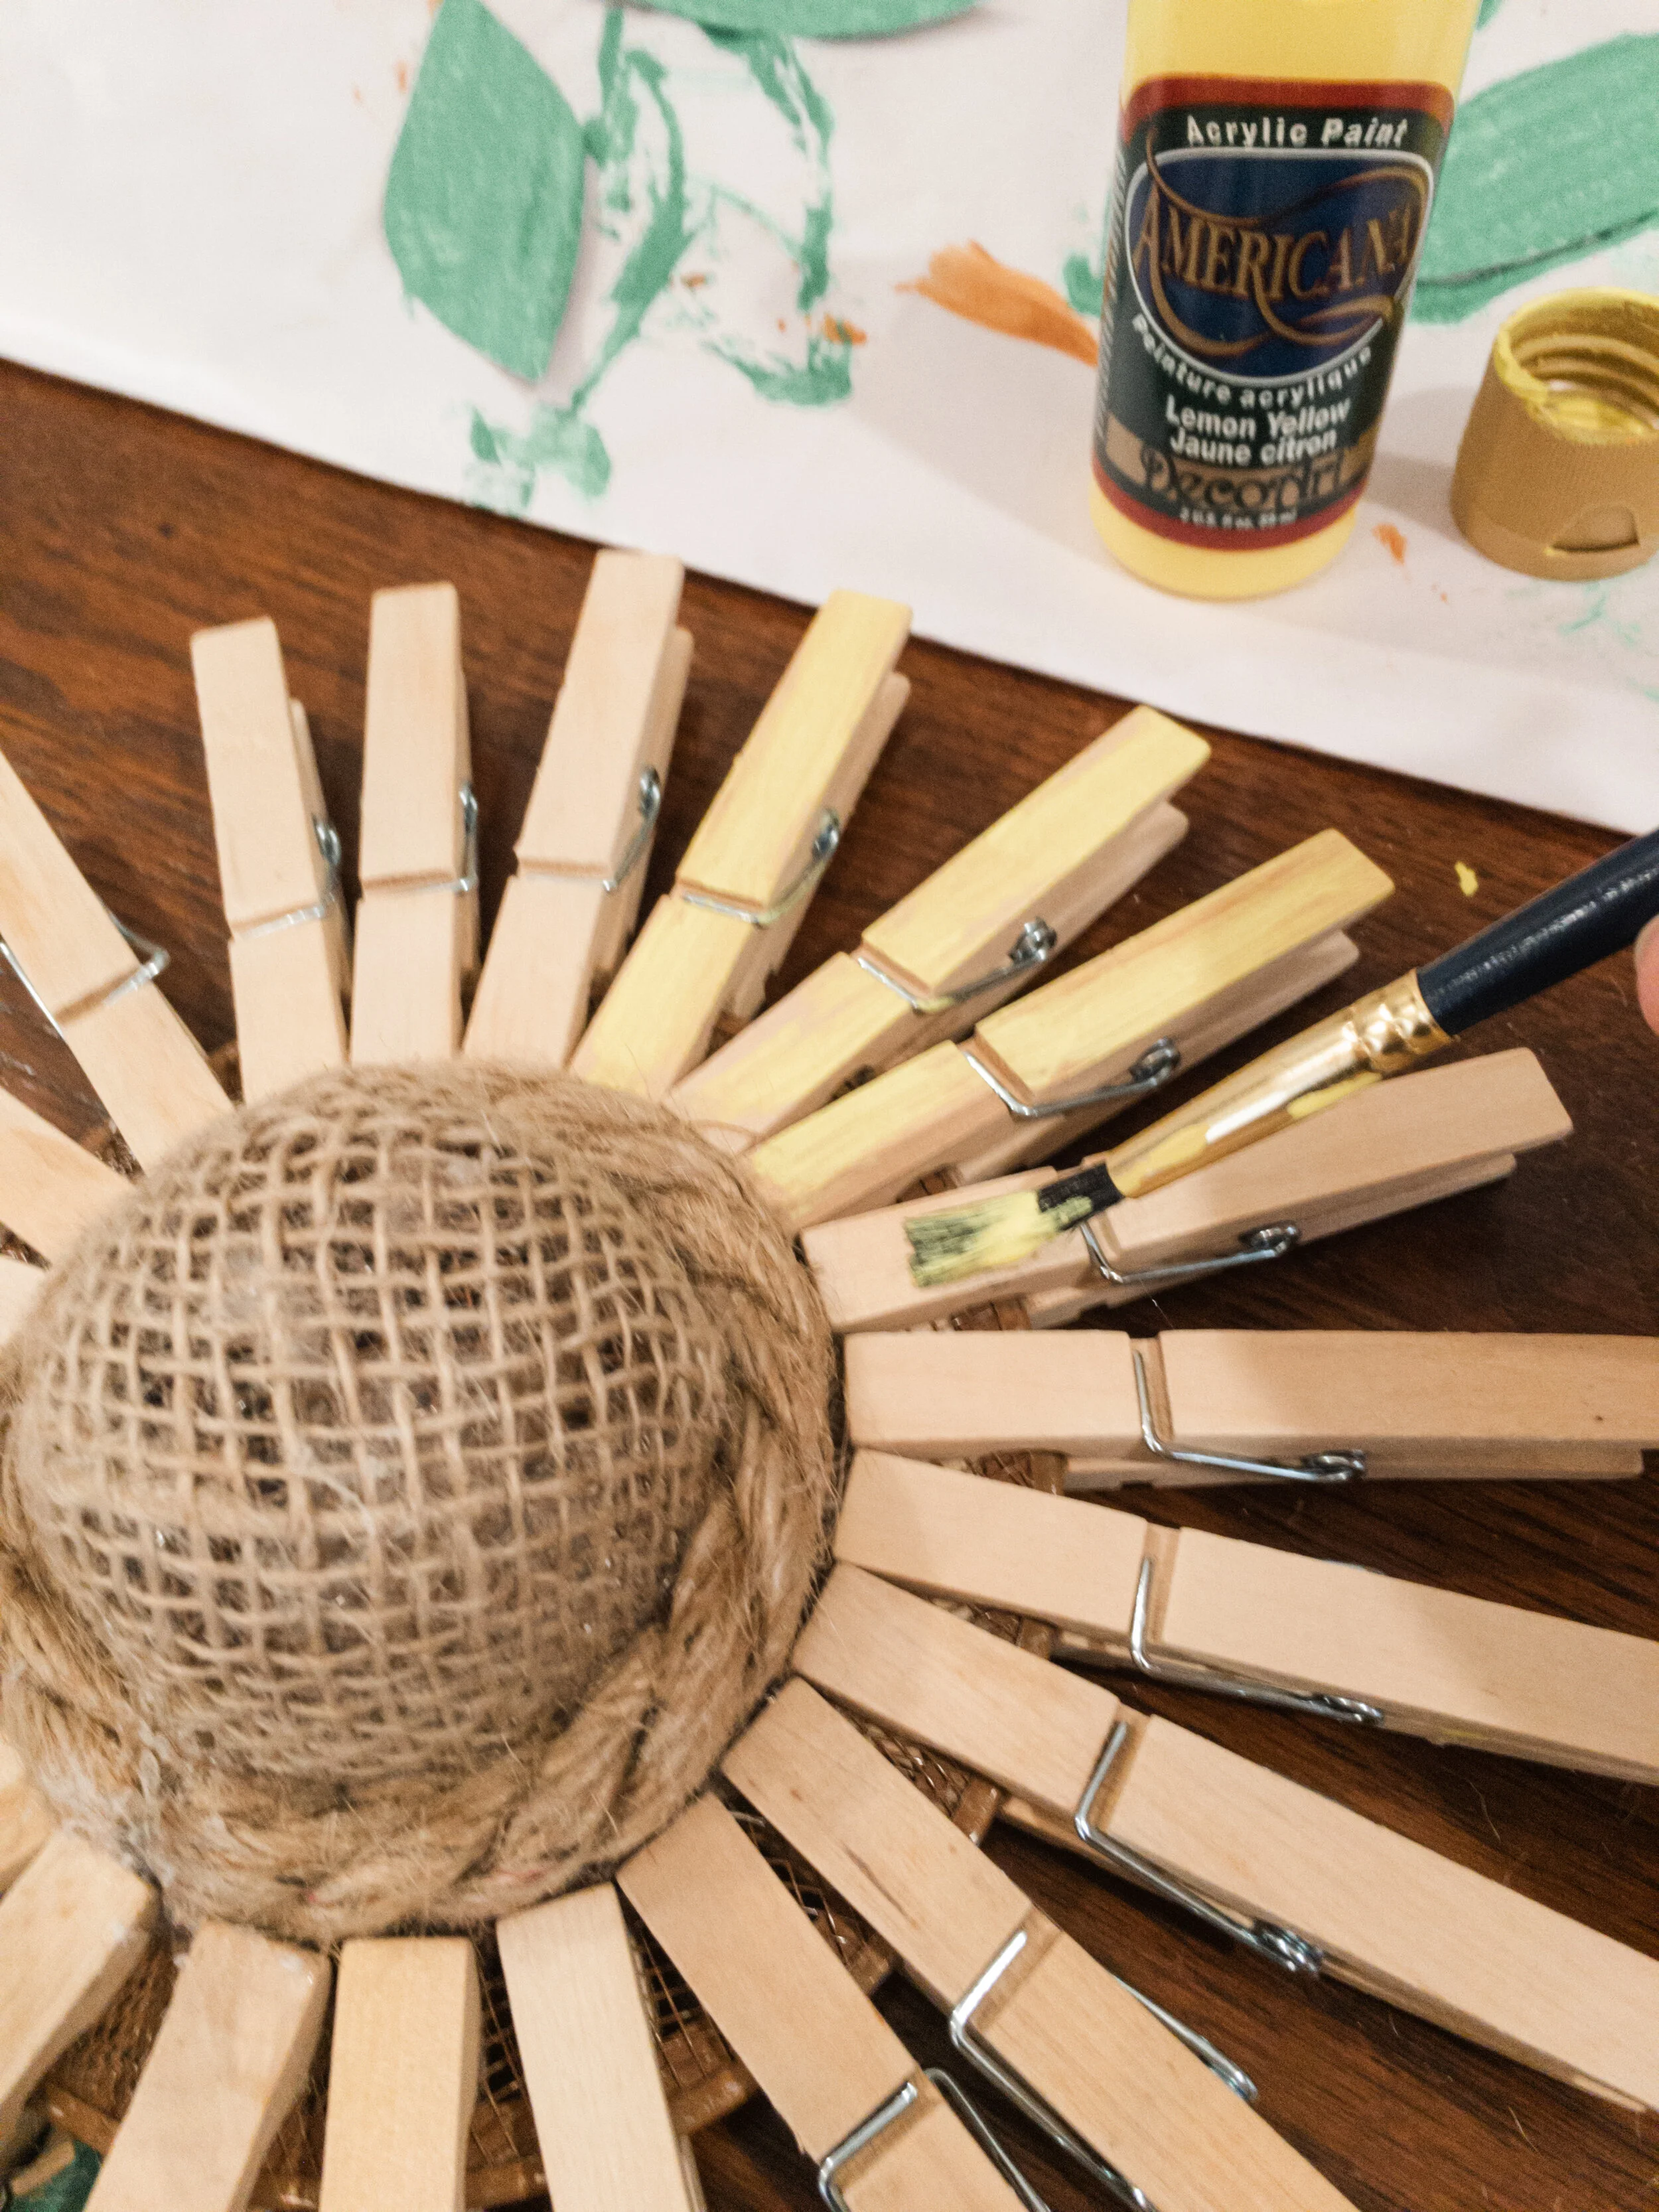
I began by adding some brown paint to the mesh strainers. It really didn’t turn out how I expected so I used some scraps of burlap and added it to the top of the flower center. Much better!


Now it was time for the clothespins. I simply clipped them to the strainer. When they were where I liked them I used hot glue and glued them to the strainer so that they would stay in place. I ended up adding some smaller clothespins to the smaller strainer because I didn’t like the gaps that were left when I only used the regular sized clothespins. It filled it out nicely and gave it more visual interest. I also added some jute to the larger flower to cover up the space between the clothespins and the center of the flower. Lastly, I glued the wooden dowel to the back of the flower. I really like how the flowers don’t look exactly alike.


Next came the paint. I didn’t want to completely cover up the wood of the clothespins so I decided to use a dry brush technique and lightly paint the clothespins yellow. I added a little brown to the burlap and painted the wooden dowel green.

To add more textural interest I decided to cut the leaves out of a Dollar Tree cookie sheet. These things are awesome! Of course they needed some green paint to match the stem. I attached the leaves to the wooden dowel with hot glue. I also cut a circle for the center of the flowers and hot glued those to the back of the flower also.


Ta Da, aren’t they cute! I think they will add just the pop of color that my front porch needs. After Mother’s Day I will put them in among the flowers in my landscaping. I love to have different things in my landscaping to give it a touch of whimsy.
Make sure that you are following me on Facebook and Instagram to see more ideas that I have for your home and yard. THANKS!
$10.00 DIY Padded Headboard
What do you do with an old wooden headboard, some old pillows, a mattress pad, and a piece of fabric? Well, you make a padded headboard of course.
Sometimes at the end of a long day you just want to sit in bed and read a good book or watch a little TV to unwind. This is something that Anji likes to do however, she didn’t find it very comfortable sitting in bed and leaning up against the wall. She had an old wooden headboard but it really wasn’t her style. I really needed to come up with a solution to this problem without spending a lot of money. Well one day I was going through some things in my storage room and saw a bunch of pillows. My son is always on the quest for the perfect pillow so we had quite a few in the storage room that were not to his liking.☺️ It was then that I came up with a kind of crazy idea!

Well as you can see from the picture this bed was in need of a lot of help! If you can remember from my blog about Anji’s bedroom we were working with a really tight budget so I needed to get creative. I love challenges like this! So, with the pillows that I found in my storage room and a twin size mattress pad that I had (I don’t even have a twin size bed, go figure) I got to work.


As you can see from the pictures above I simply used a staple gun and stapled the pillows right on to the headboard. I then covered all of the pillows with the twin size mattress pad both to keep the pillows tightly in place and to add some additional softness.


The last step was to cover the whole thing with fabric. Luckily I found a great deal on this piece of upholstery fabric at JoAnn Fabric for about $10.00. I liked that the fabric was soft, durable, and a very neutral color so that it would go with any comforter that Anji wanted to use.

So here it is! Not too bad for $10.00 and I was also able to reuse the pillows, mattress pad, and headboard instead of them going into the landfill. Win! Win!
If you haven’t seen Anji’s full bedroom makeover make sure that you go and read that blog as well.
If you think you might want to try making your own padded headboard sometime, make sure you pin 📌 these pictures to Pinterest so that you will have this post for later! Also, make sure that you are following me on Facebook and Instagram for more great ideas! Thanks 💜.
Rope Covered Flower Pot

For this flower pot I used one medium sized flower pot, two dog toys, some nautical rope, and hot glue. The items pictured are all from the Dollar Tree, but you can use other items too. Just be creative!
Whether you are on a tight budget or not you need to make this flower pot! It is easy to do, and I used a very unusual item to give this flower pot both color and texture. This will make a wonderful addition to your home décor.
Yes, that is a dog toy that you see. When I saw it I just loved the colors! Now one of the hardest parts of this DIY is getting the knots out of the dog toy. Once you have done that you need to find a way to keep the three ropes of the dog toy to stay together. With the first one I did a combination of sewing and hot glue, but when it came to adding the second dog toy rope I simply used hot glue.

I then began gluing the rope around the pot. It takes some work to connect the ropes together so that they look good but I figured that I would just make sure that part was in the back. I didn’t have enough of the dog toy rope to finish the pot so I had to use some nautical rope that I already had, but I really like how it turned out!
If you plan on using this pot outside I would suggest that you use some kind of spray to protect it. I think I will try Rust-Oleum 2X Painter’s Touch Ultra Cover Matte Clear Spray Paint. I have not used this so I am not sure how it will work.

So what do you think? I really like it! The colors are beautiful and the texture makes it so interesting. I think I might go and get more dog toys and a large container and make a basket!
I really hope that you will give this a try! Make sure you pin 📌 these pictures to Pinterest so that you will have this post for later! Also, make sure that you are following me on Facebook and Instagram for more great ideas! Thanks 💜.
Spring Bunny Sign

Goodbye 2019
Well I know what one of my New Years resolutions is going to be, keep up with blogging! I love decorating but putting my ideas into words, not so much.
Since I will be putting away my Christmas decorations soon I am going to take you on a Christmas tour of my home. For those of you who don’t know me well it is important for you to know before you read any further that I LOVE Christmas! I have been collecting Christmas decorations since I was in college. I have also made a lot of my own decorations. The most Christmas trees that I have had up at one time is seven! I haven’t done that for awhile. When we moved we rented a small U-haul that contained mostly holiday decorations, most of those being Christmas. I have been very lucky that in the past two houses I have lived in have had large storage rooms with lots of shelving!
So here we go!
Living Room


Dining Room


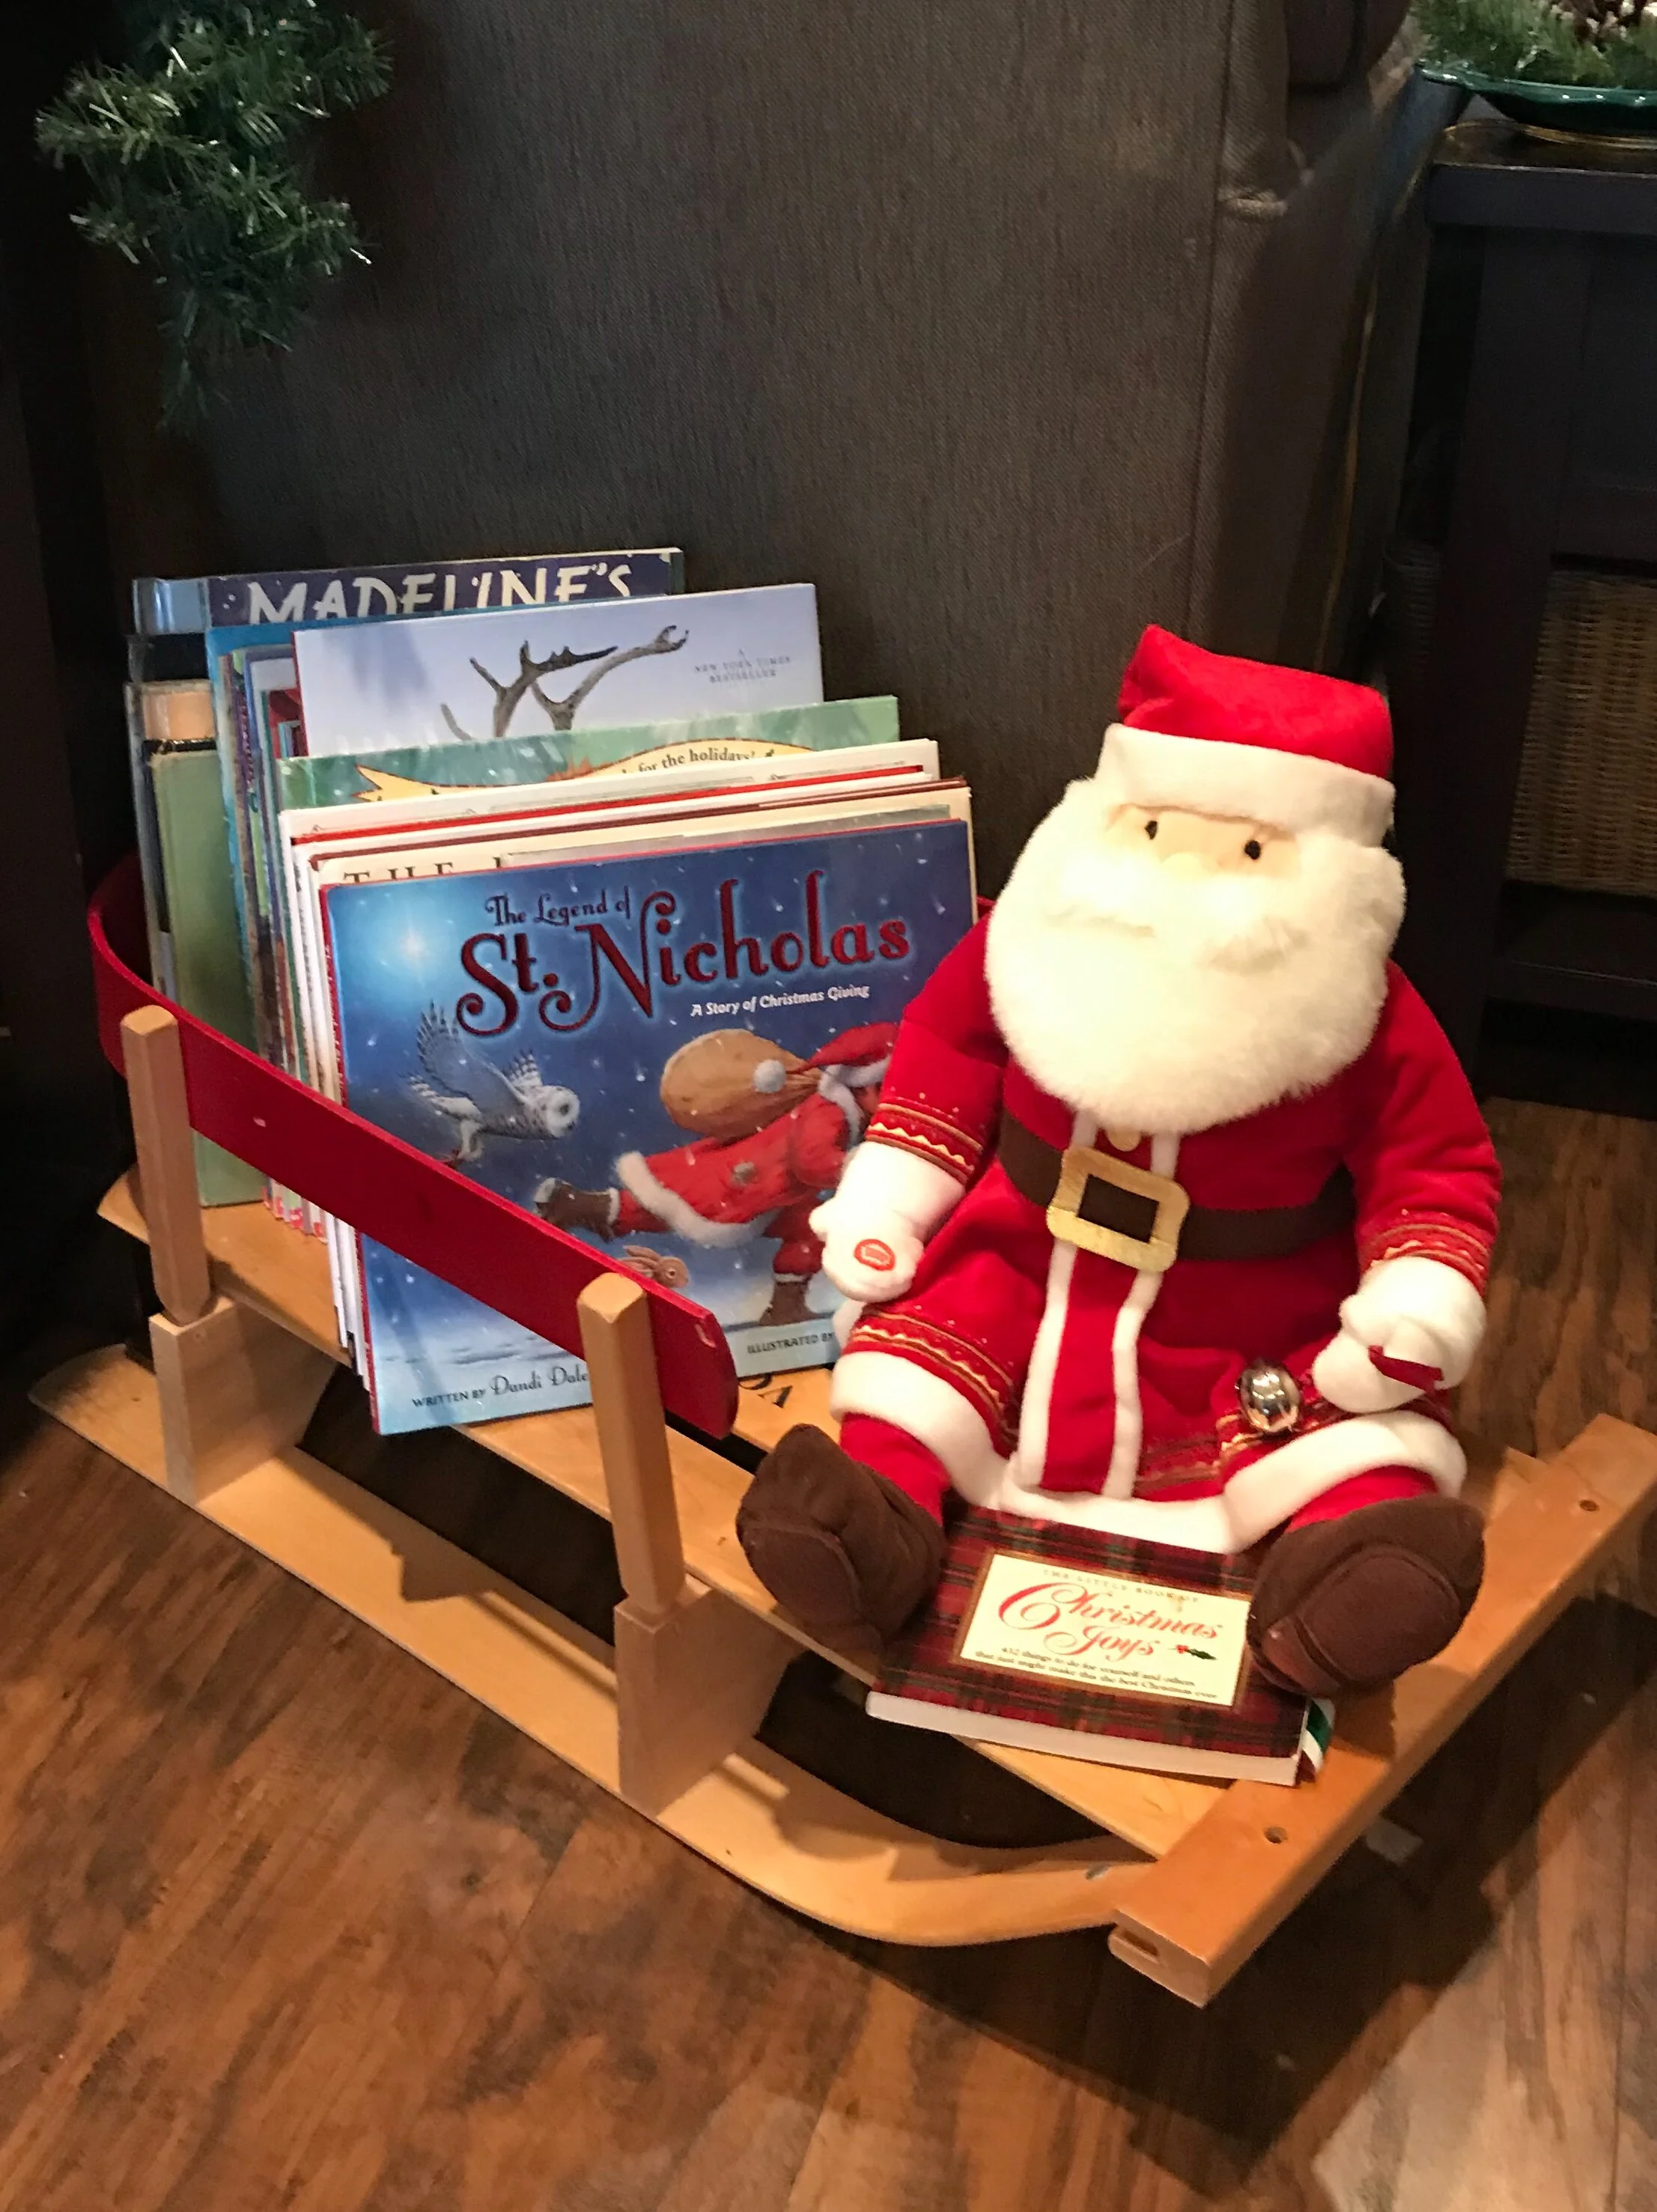
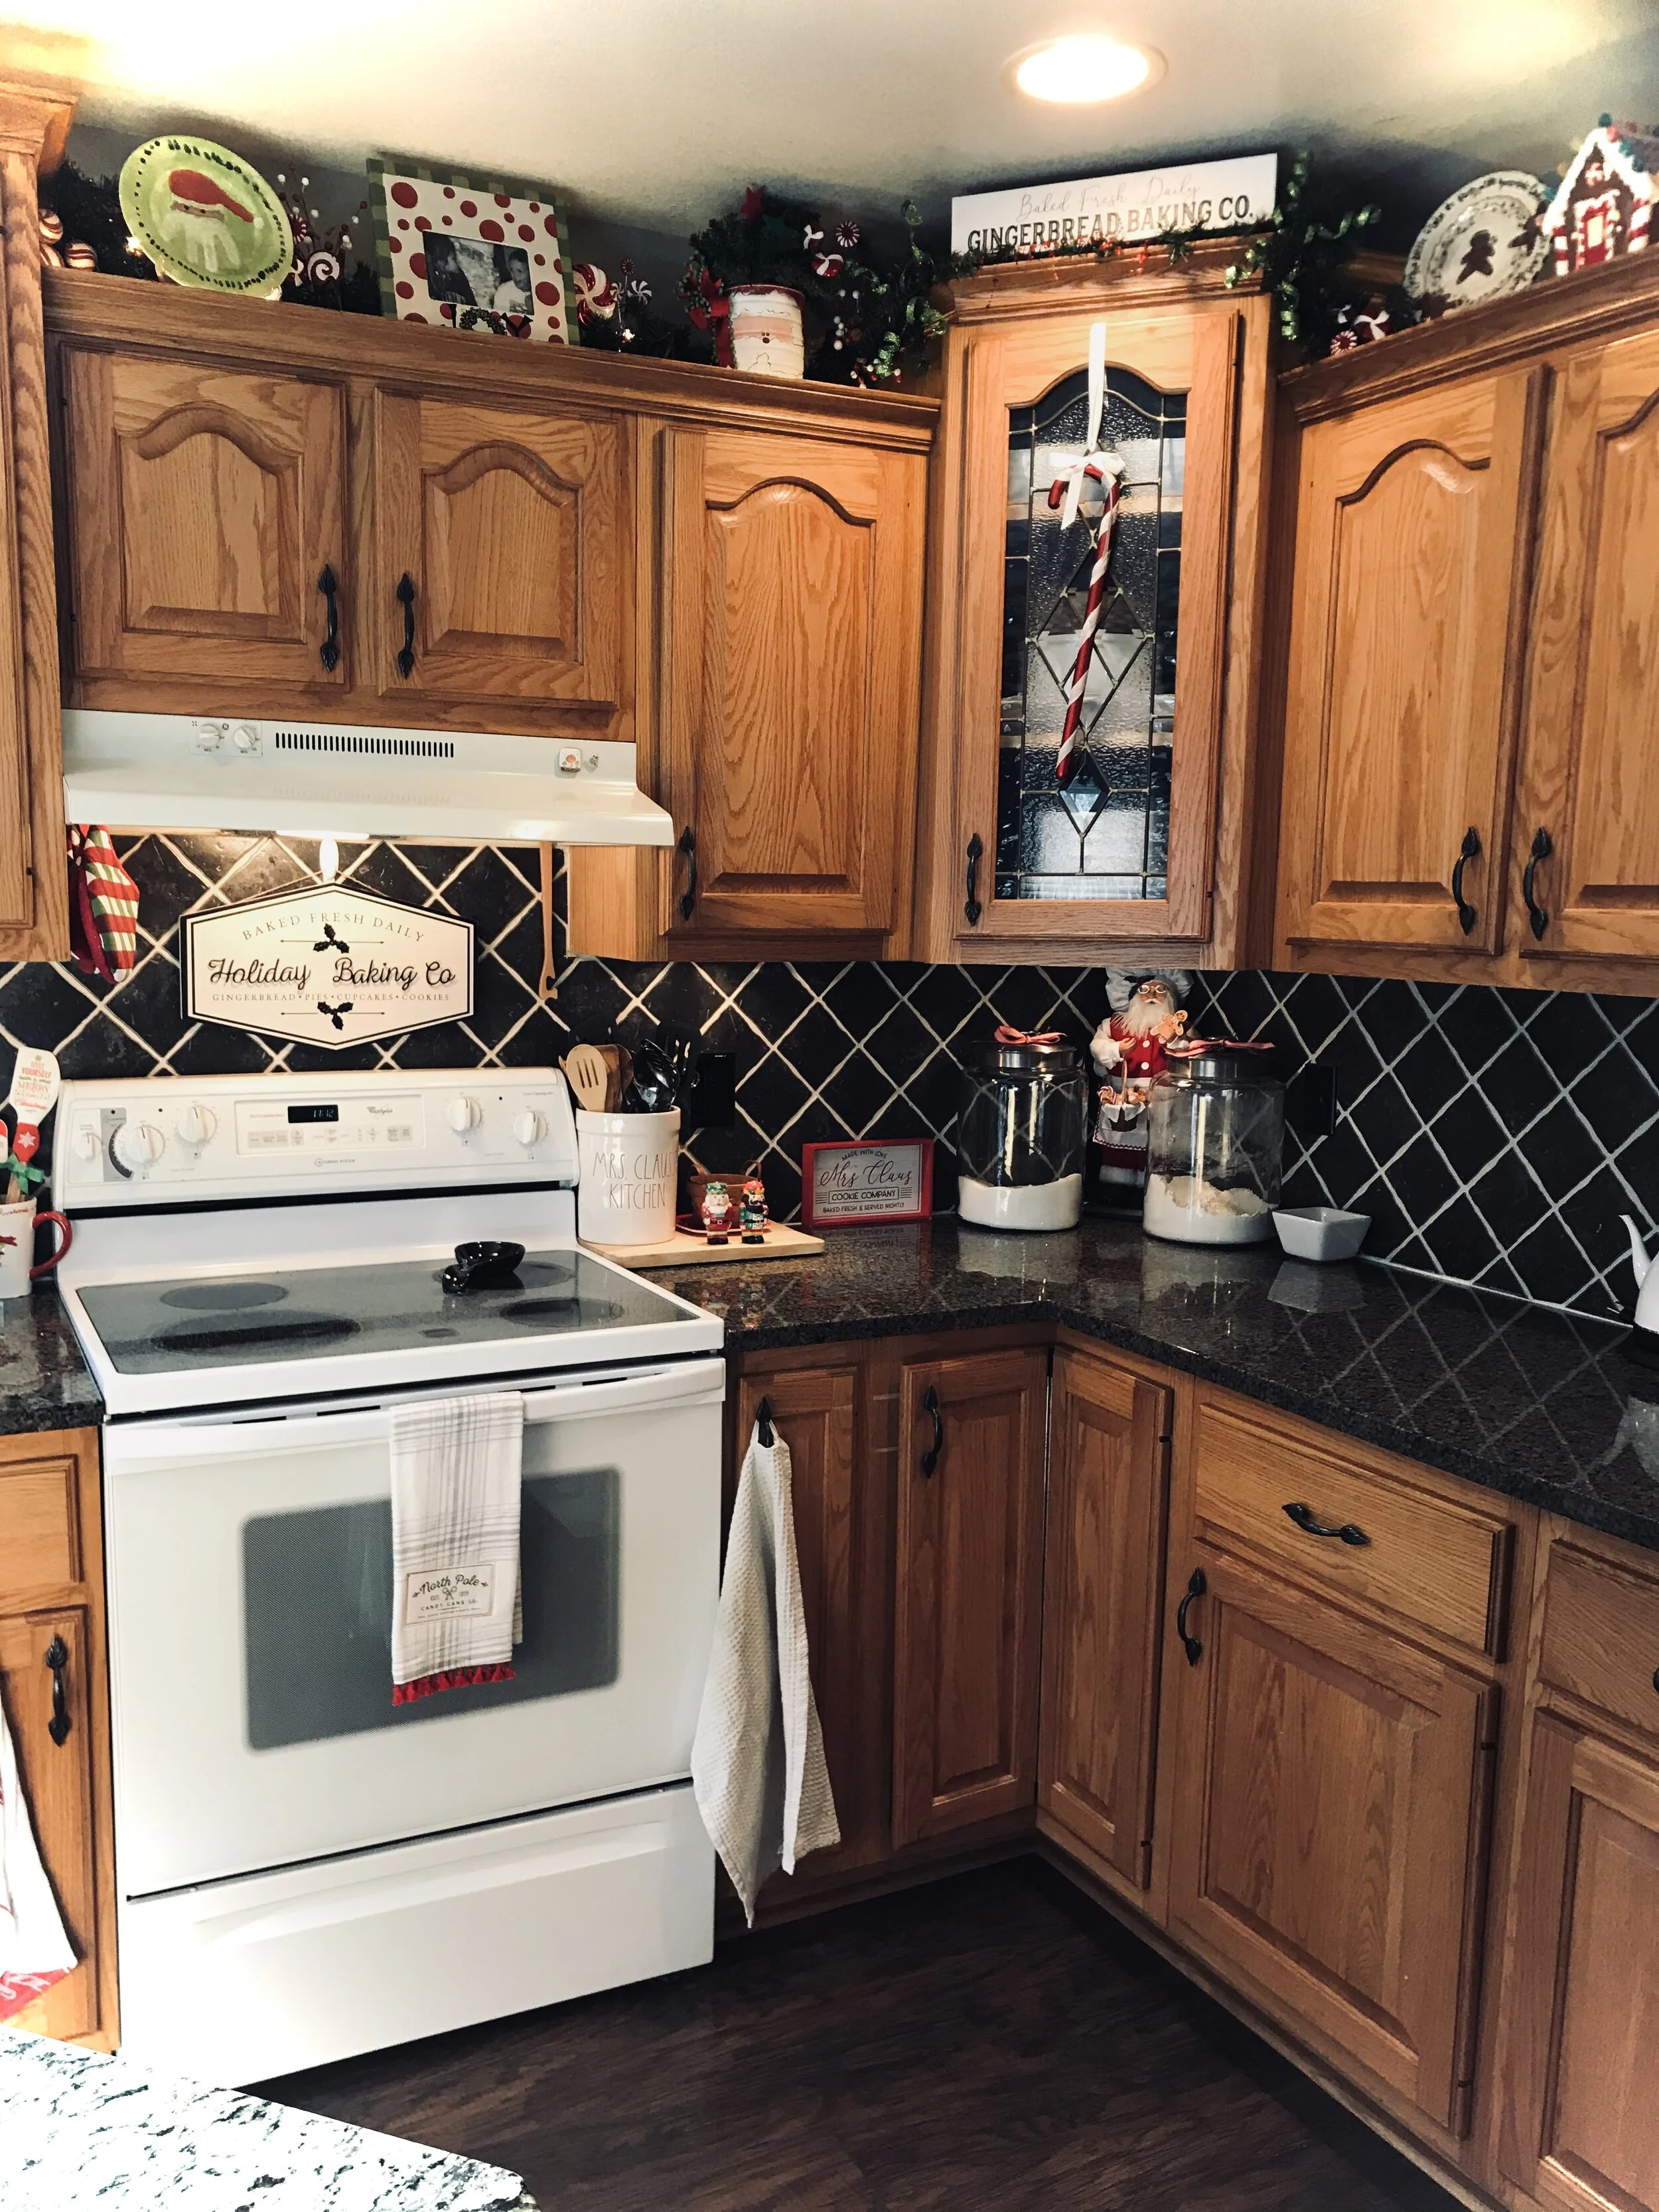
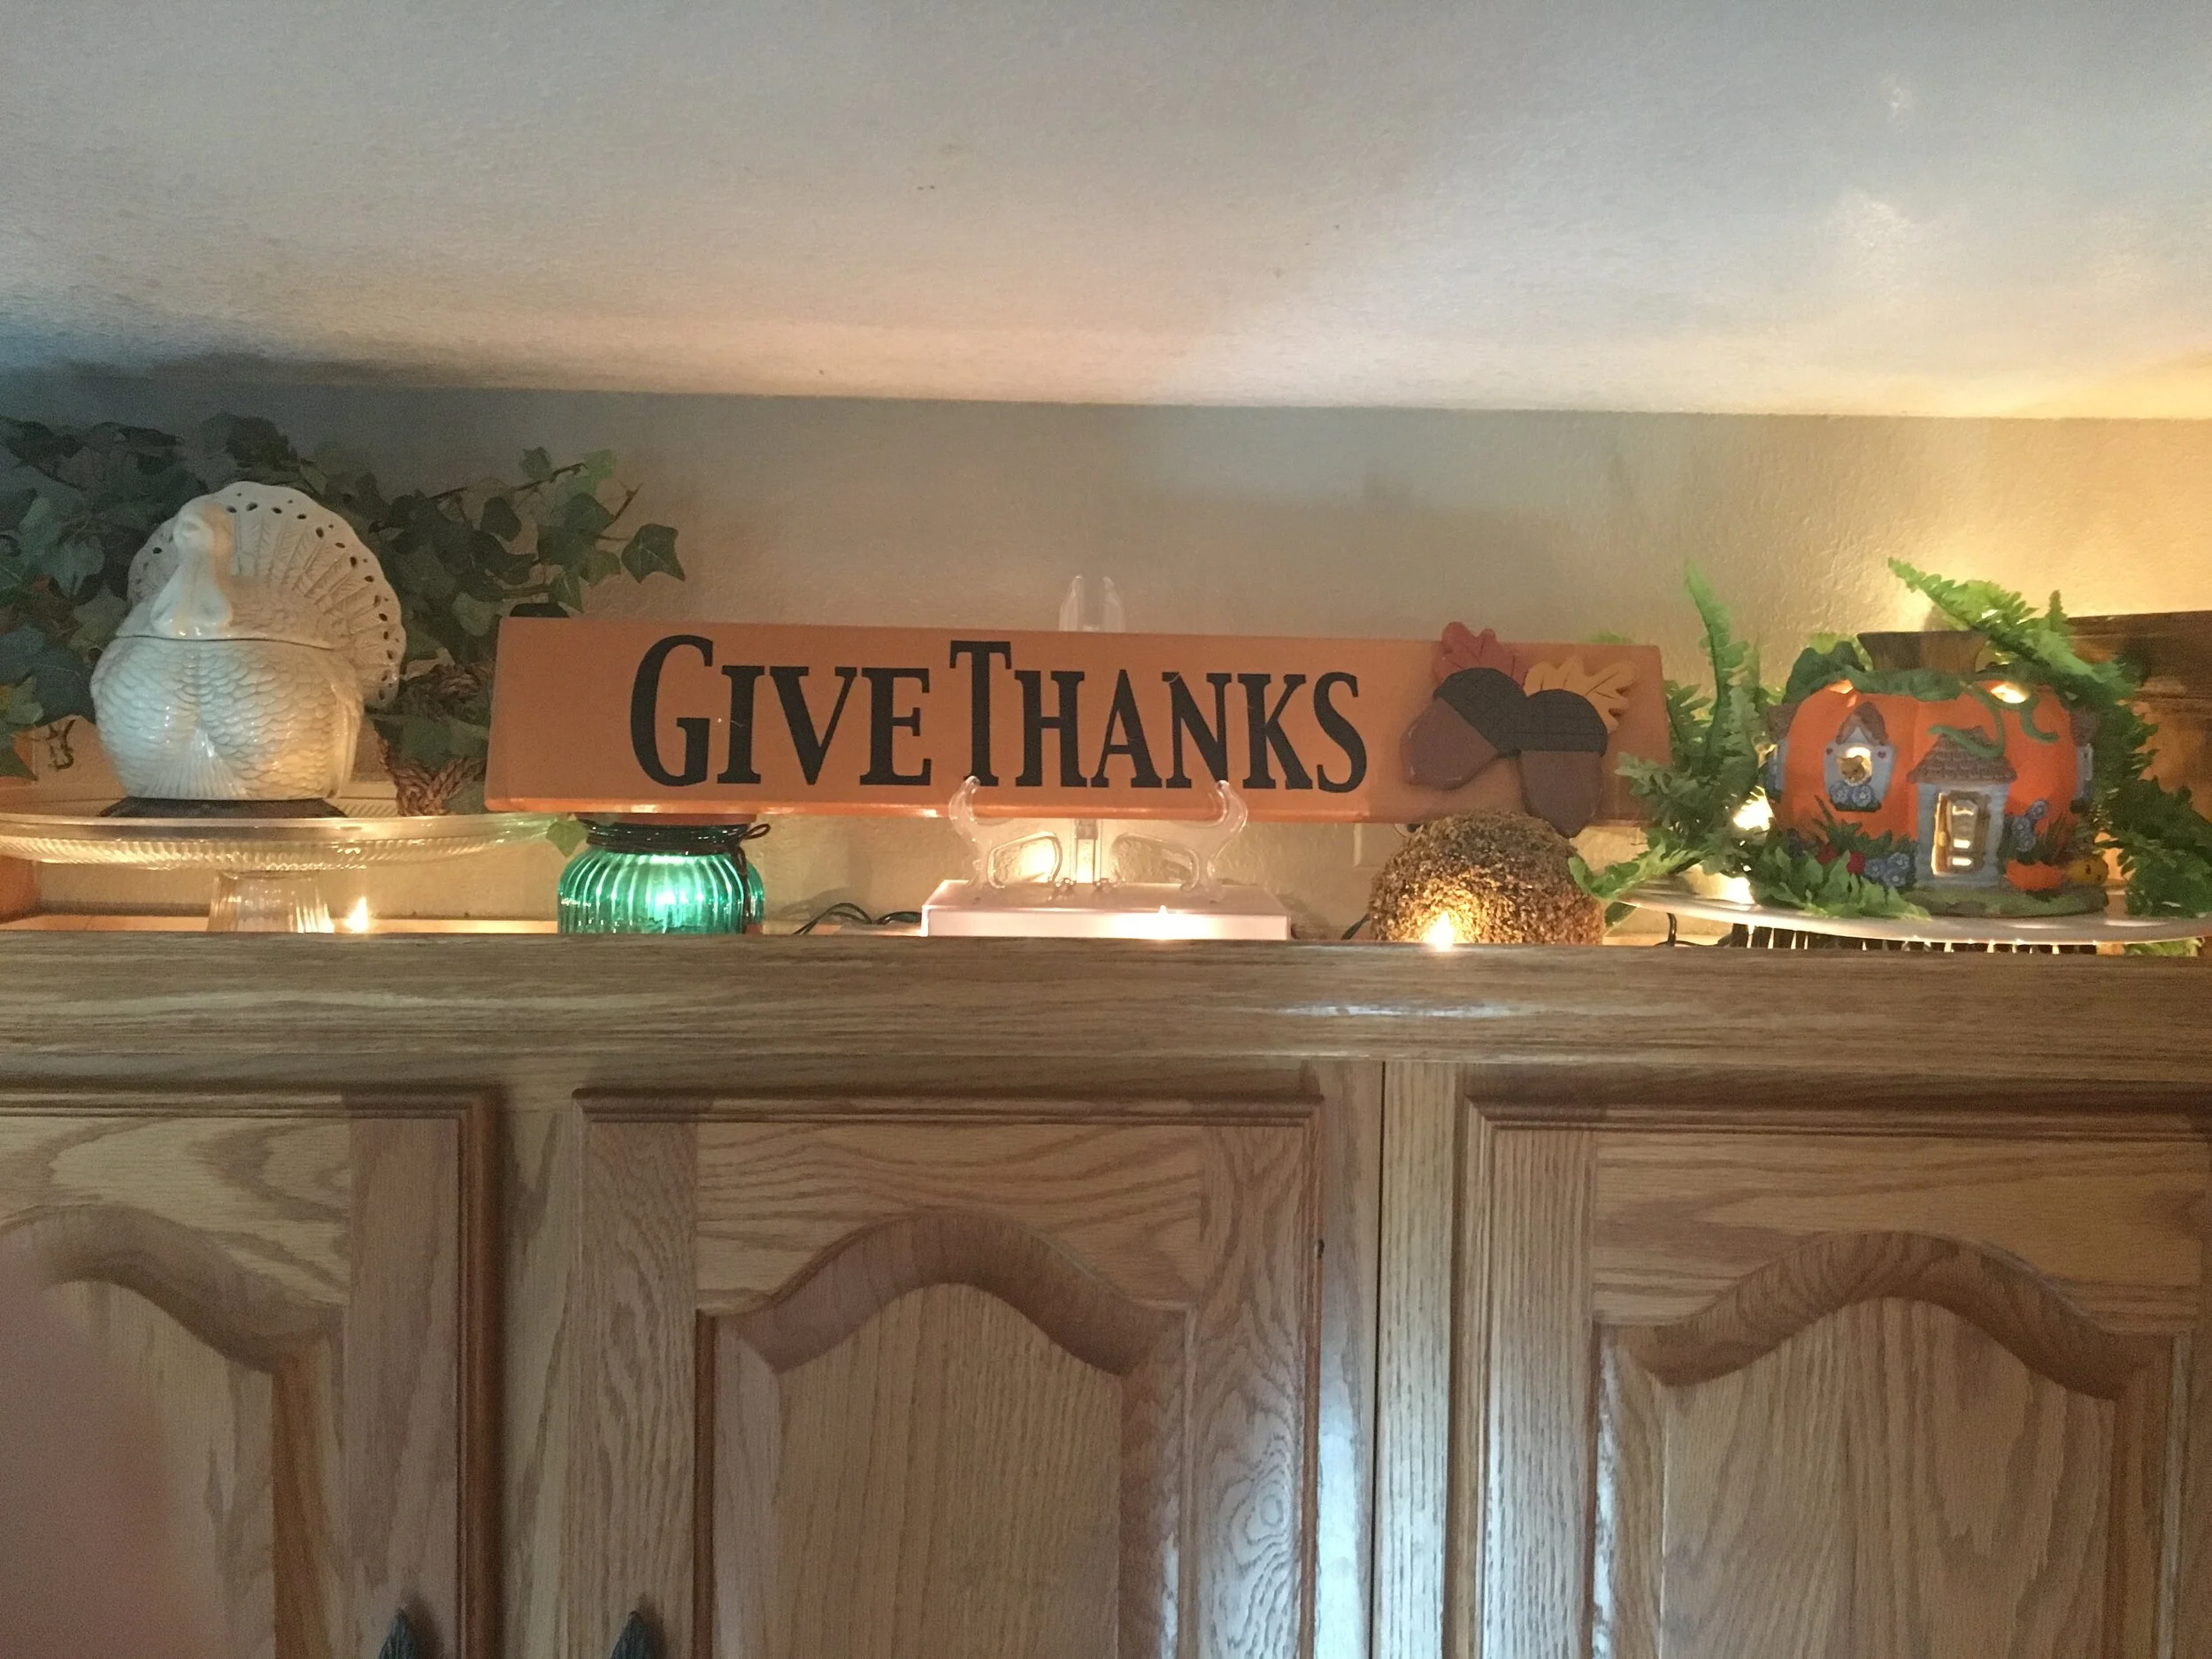
Kitchen


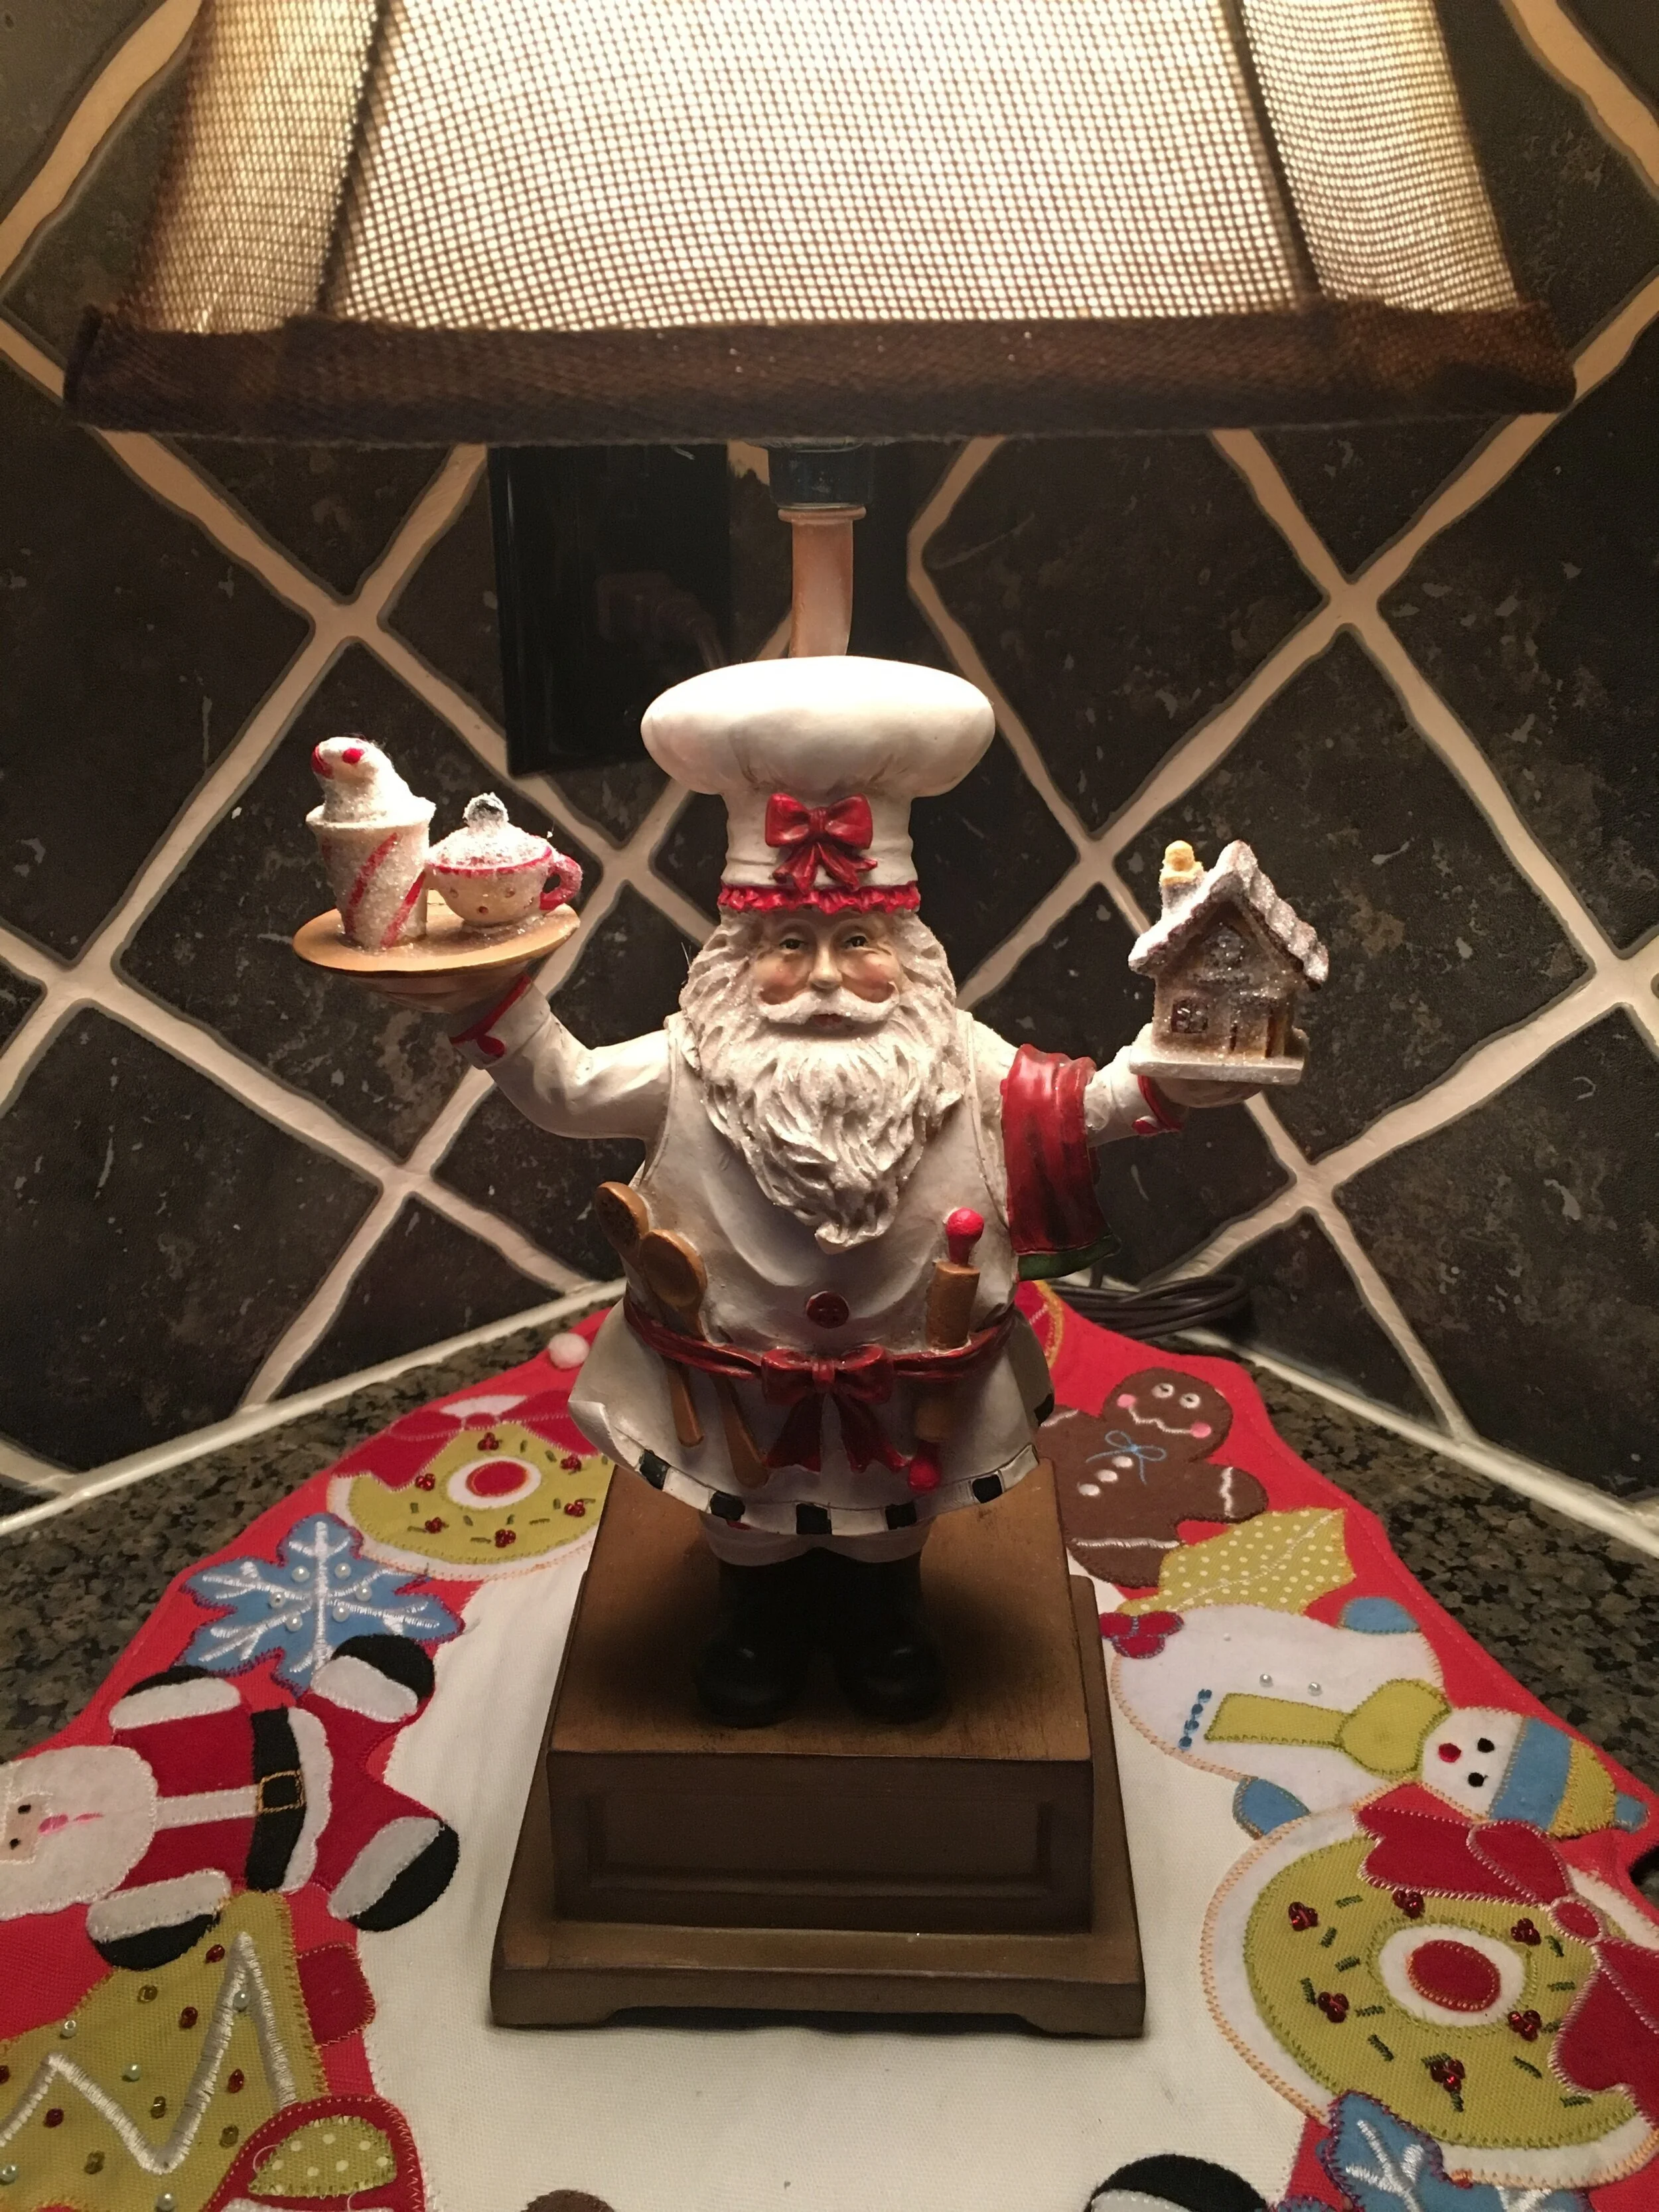
Around The House


What I love most about Christmas is spending time with family and friends and making memories. Most of my Christmas decorations remind me of a person or a special event. The tree in my living room is full of ornaments that have been given to our family or handmade. My favorite ornaments are the ones that my kids have made. They are even more special now because my kids are in their twenties and it brings back wonderful memories of their childhood. A few years ago I started collecting picture frame ornaments that I use to display pictures of past Christmases. I also have decorations from loved ones that are no longer with us. Displaying these decorations reminds me that even though they are not here they are remembered in a special way.
Thank you for your support of my new business adventure. I am very grateful for this opportunity and excited to begin a new year with new possibilities!
Anji’s Bedroom
Life is hectic, there are always a million things to do but sometimes we need to stop and be still. Where do you go in your home to unwind? Mine is my porch. I have a comfy lounge chair, a ceiling fan, and a beautiful view. I love to sit there and look at the colorful flowers and watch the hummingbirds at the feeder. Sometimes I get a good book and read. We all need that special space in our home where we can go and unwind.

Well here was Anji’s space, the place where she would go to unwind and get away from the stress of the day. I think that we can all agree that this space is not a place to unwind. The dark colors and clutter are depressing and certainly don’t provide a comfy relaxed feeling.
There were a few challenges to this project but I love a challenge! Because this is a rental property we were not able to paint, and secondly we were trying to keep the cost low. Anji had already found a comforter set that she liked so we had a color palette to work with. I began by shopping her home, finding things that she already owned. The first of which was a headboard.
Anji had a headboard but she really wanted a padded one so I got this crazy idea. Because I have a hard time throwing things away I knew that I had some pillows that I wasn’t using anymore, and presto! I was also super lucky because I found this awesome upholstery fabric for only $10.00!


This dresser needed a little face lift. The gold drawer handles were dated and some were missing. So for $40.00 I was able to replace all of the handles!

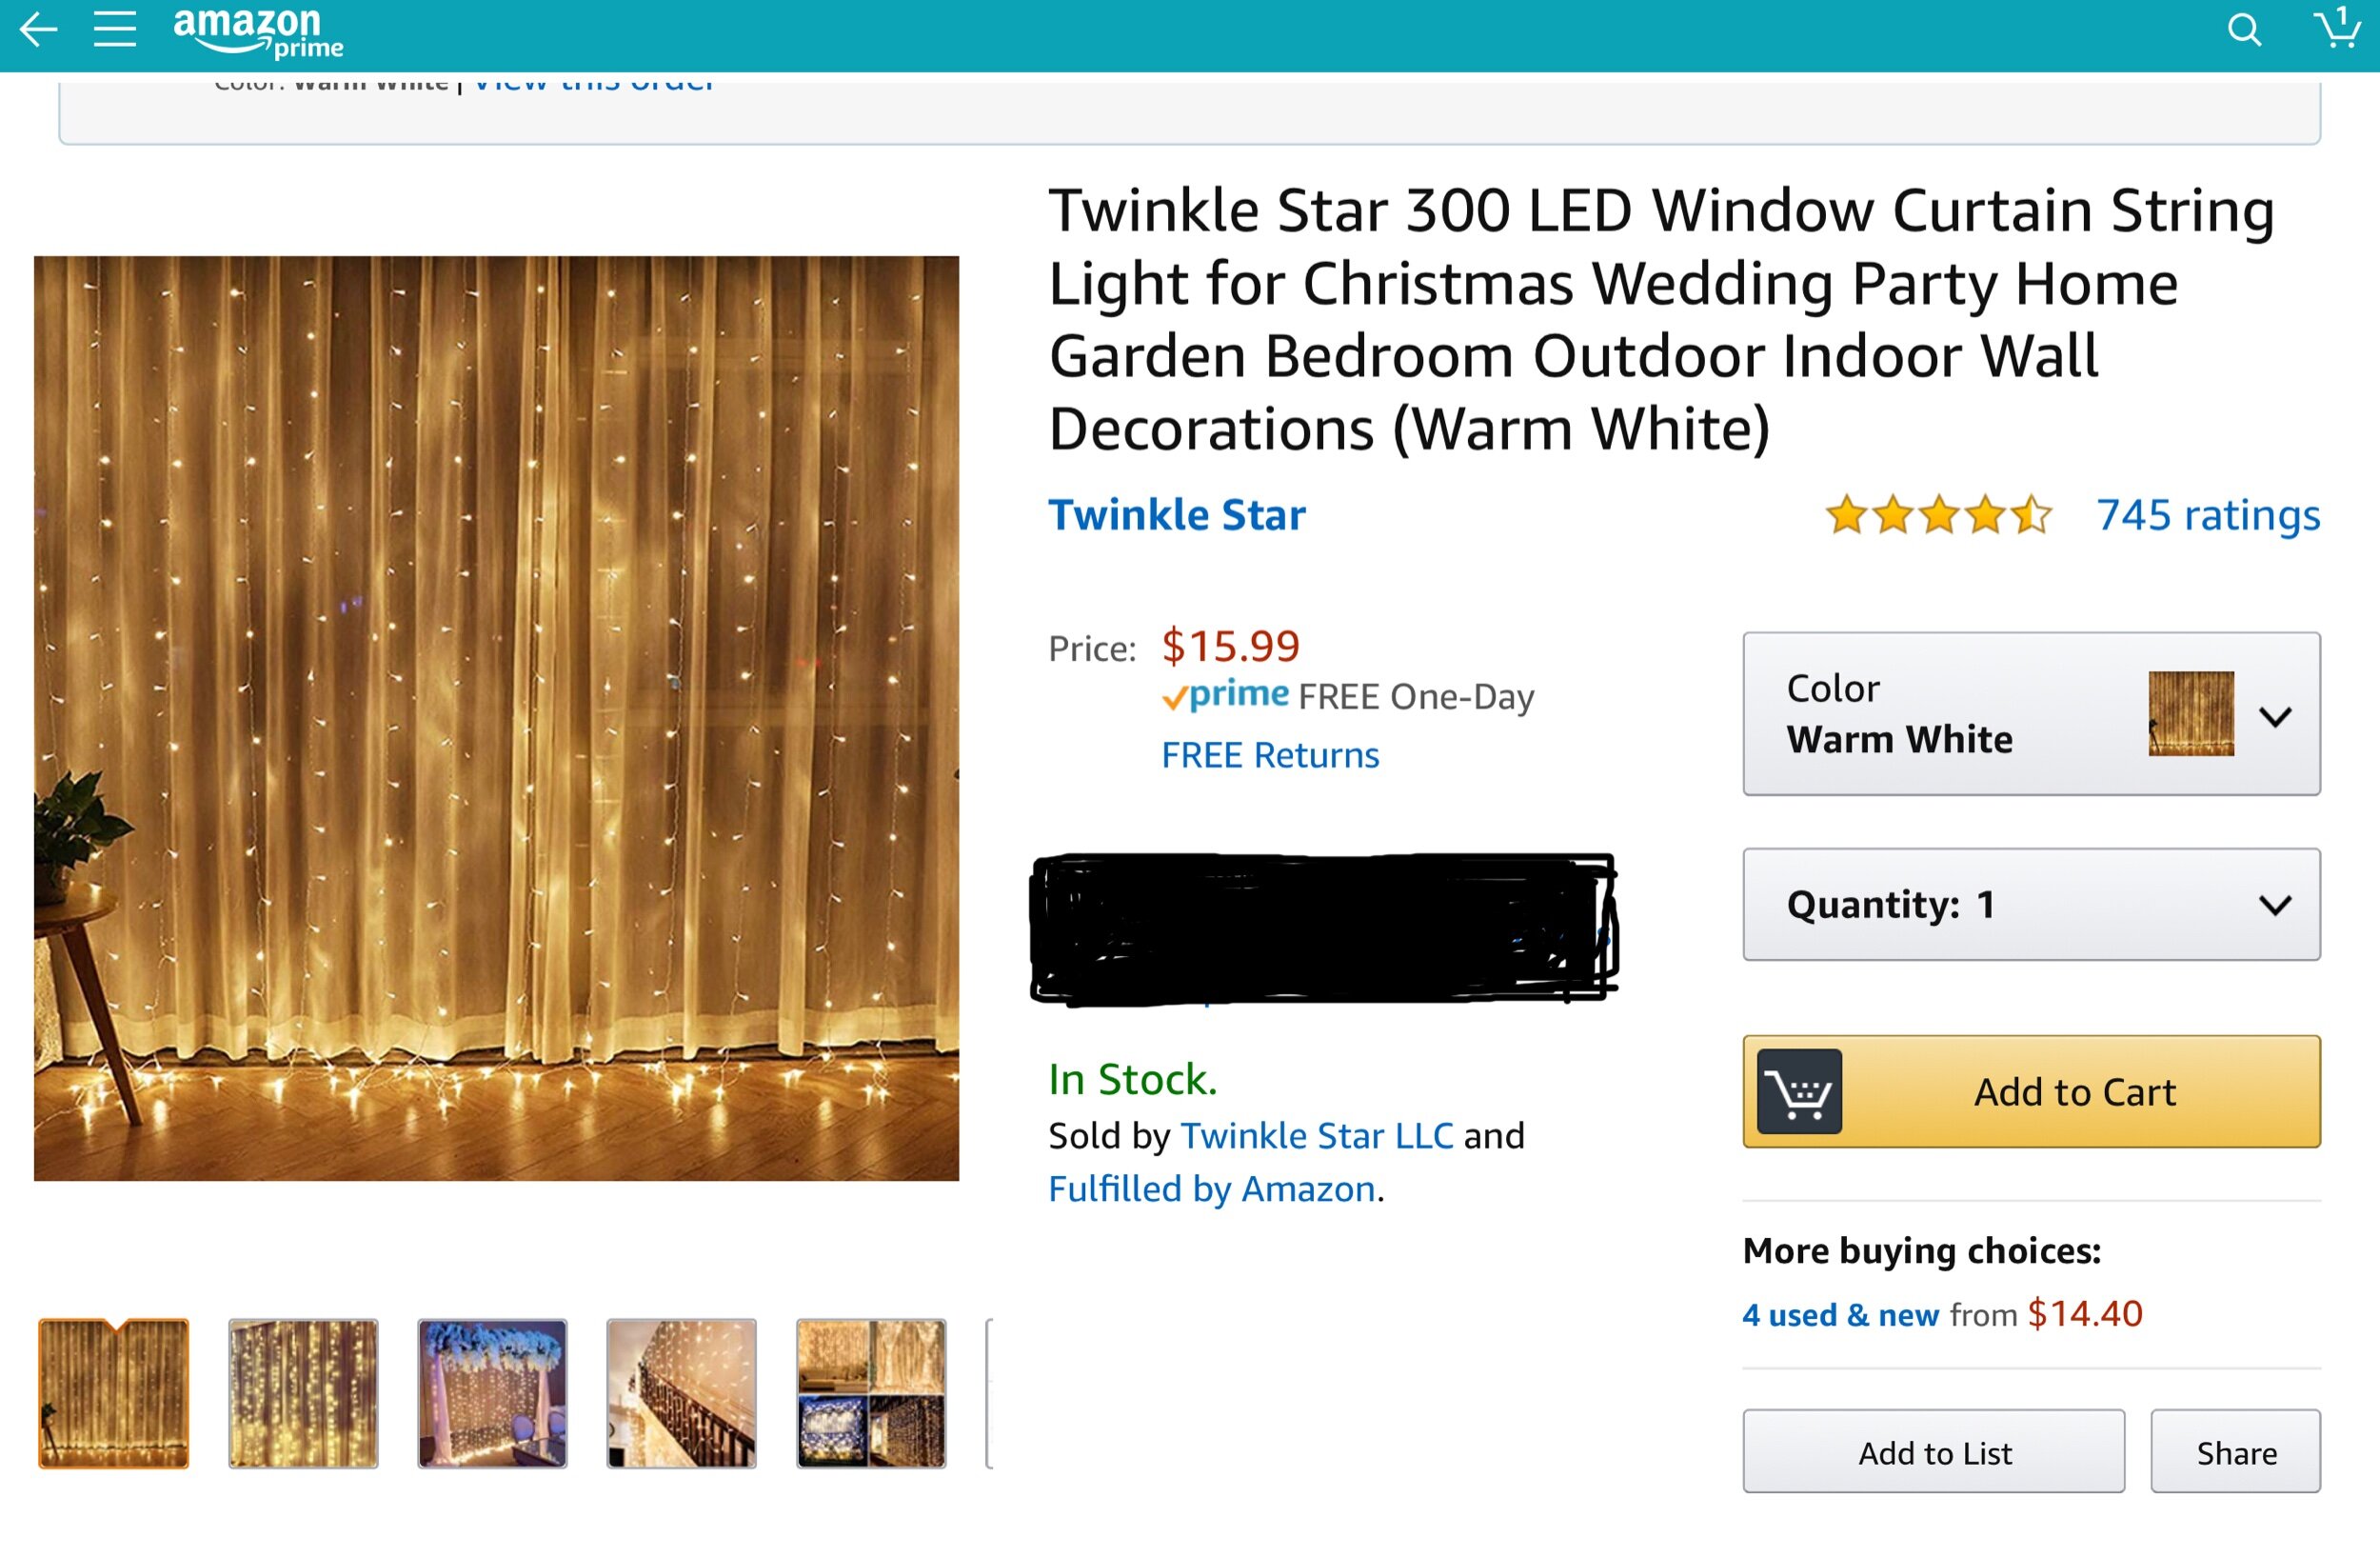
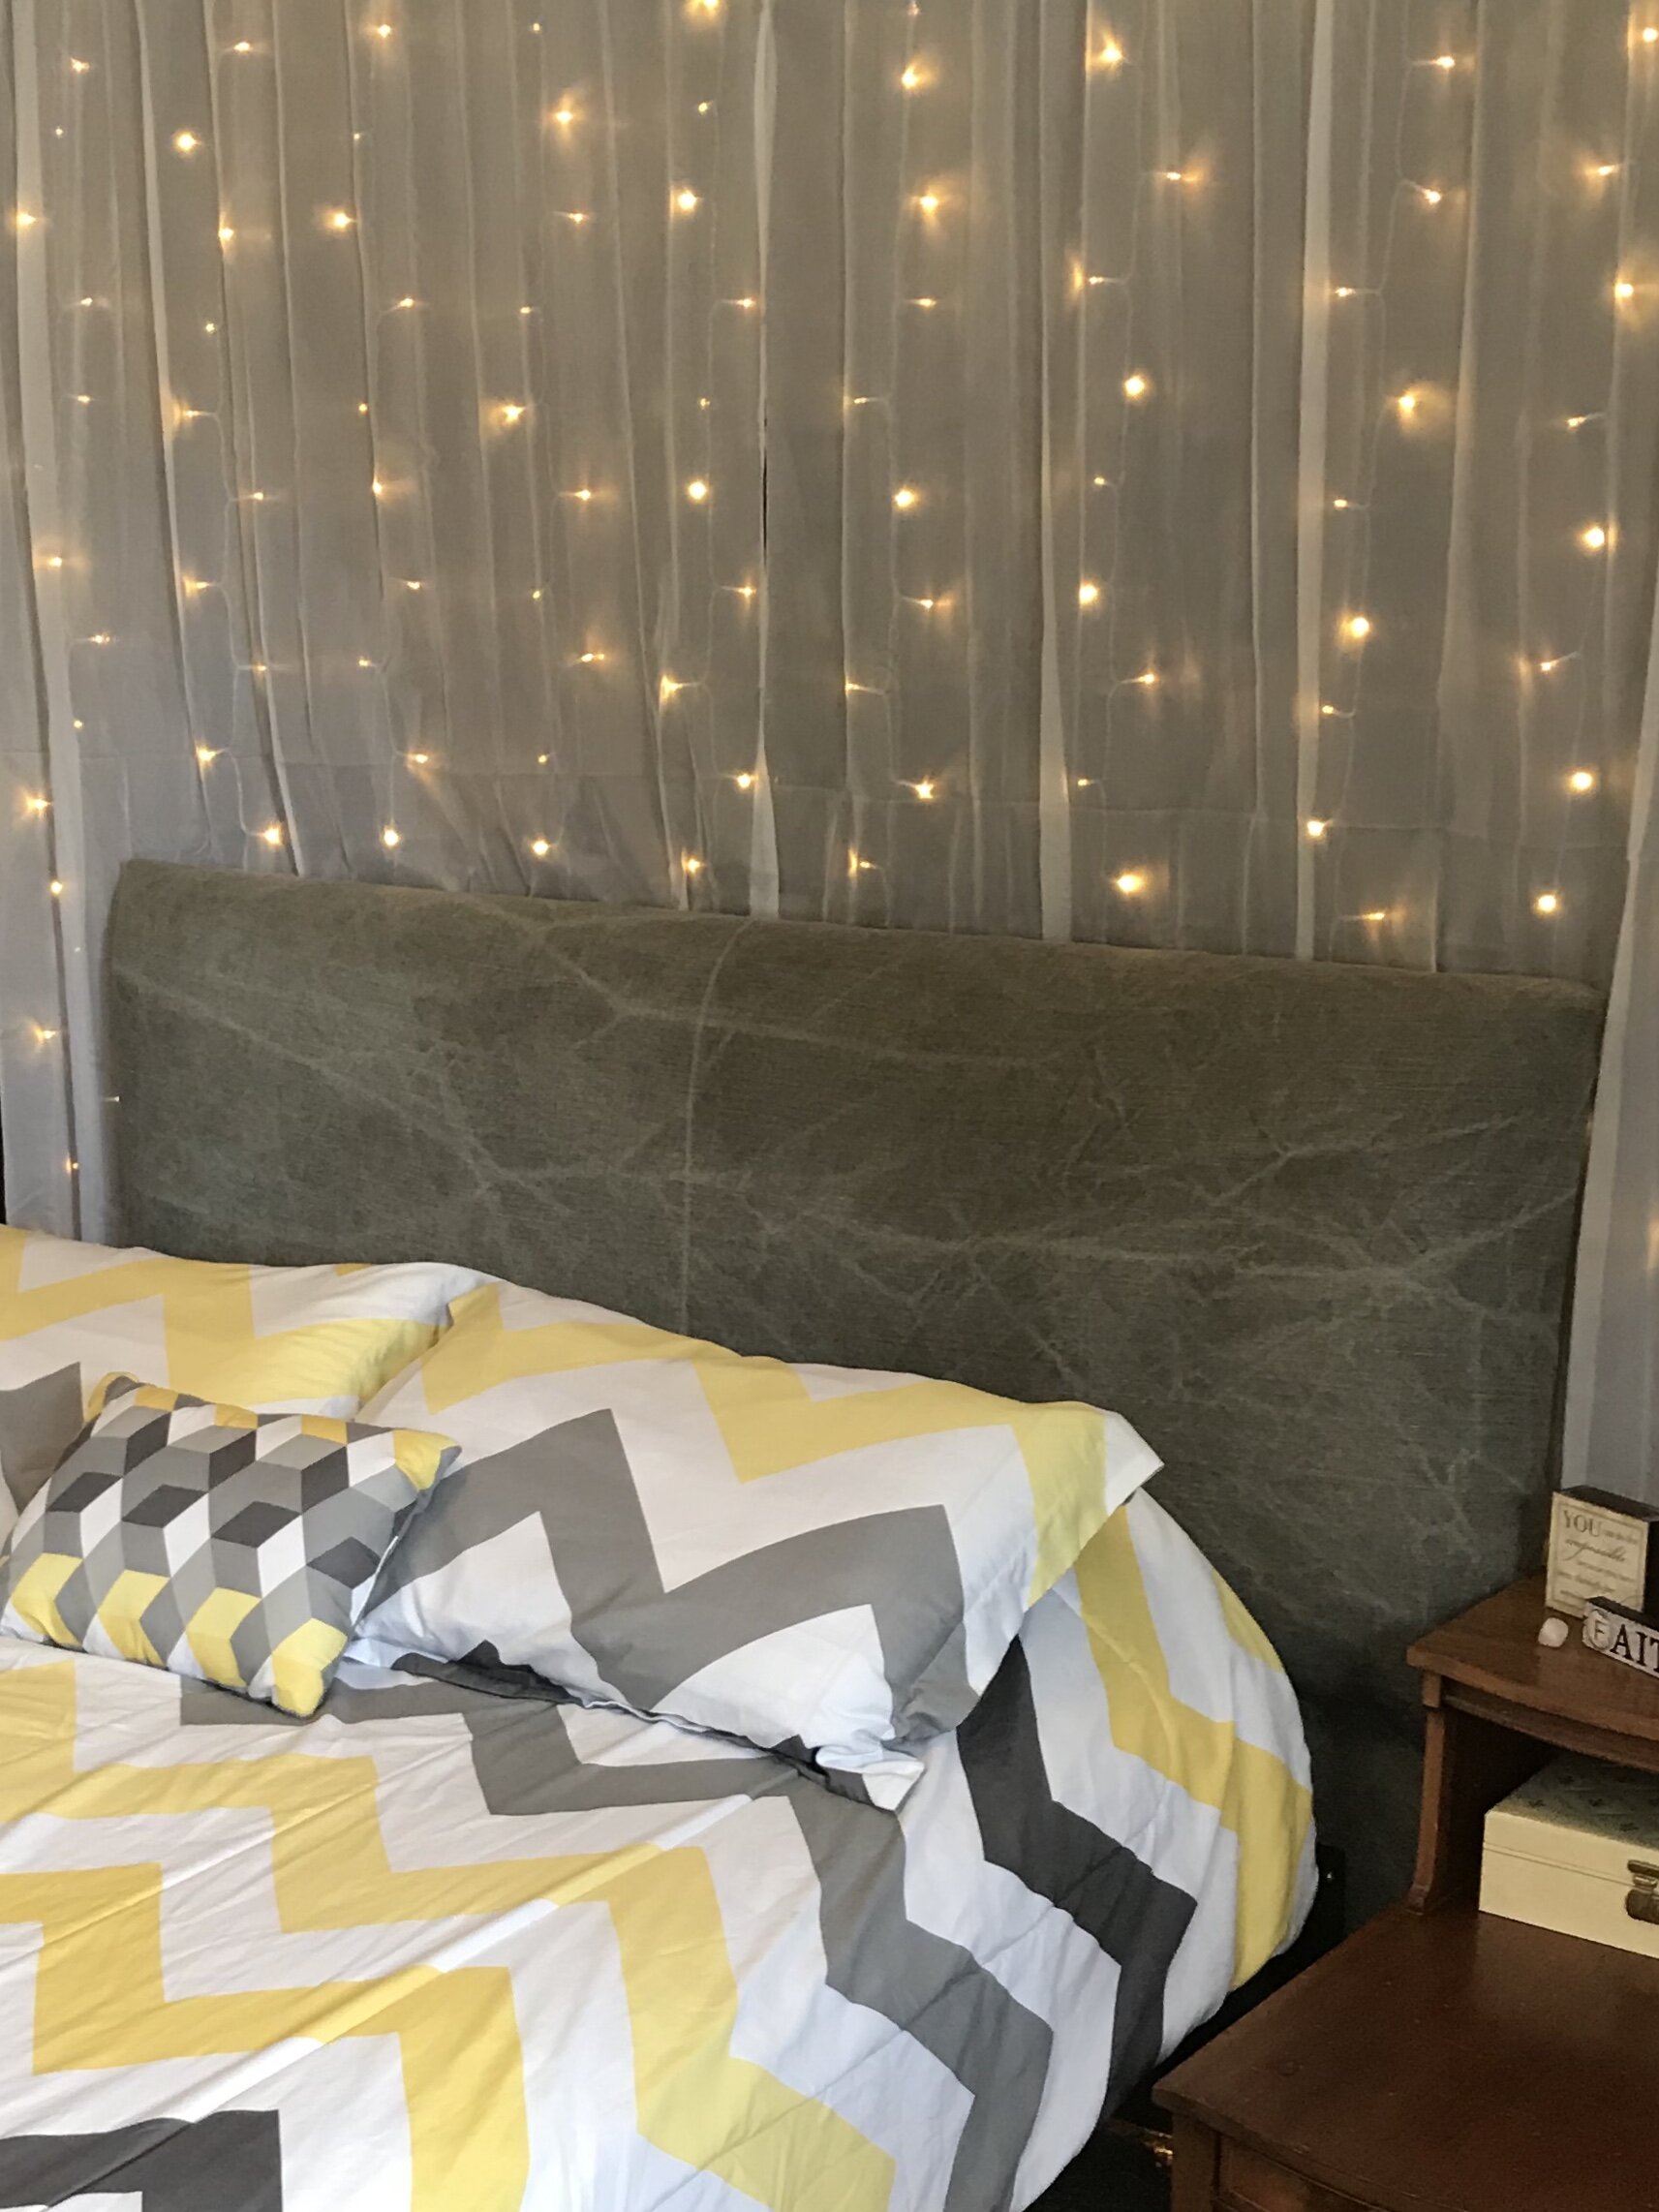
The next thing that this spaced needed was light. The paneling behind the headboard was very dark and because I couldn’t paint the wall I needed to find another way to lighten it up. Anji loves decorative lighting so I went on Amazon and found some really affordable curtain lights!


A relaxing place to read.
The white curtains really brighten up this corner. They were only $10 at Kohl’s!
Here are the before and after pictures!


I so enjoyed working on this room with Anji and I just love how it turned out💜. It just goes to show that you don’t need a big budget to get big results!
Holiday Countdown!
October, November, and December, what a wonderful way to end a year. Three holidays in three months! This is the time of year that with the beginning of each month I can’t wait to get out my holiday décor and get decorating! Since I have decorated for fall I already have a head start. With just a few changes I can go from fall to Halloween to Thanksgiving!


Now Christmas decorating on the other hand takes a lot more preparation. If you don’t have the time or are not sure where to start I would love to help! Just go the Contact Me button on my website or private message me.


Please excuse the poor picture quality. Hopefully this year Santa will bring me a camera.
Where is Fall?
Well here we are September 28th and I am still waiting for fall weather! It may not feel like fall outside but it sure looks like fall in my house, how about yours? The change of seasons is a great time to shake things up with your home décor.
The first thing I did when getting ready to put out my fall décor was to gather items that gave off more of a summer vibe and put them in storage.

I then went to my storage room and found the fall décor tote. I’ll tell you more about how I organize my storage room later.
Now don’t be intimidated, but this is my fall décor. It’s really not that much. I’ll share more pictures of what I did with these items in another post.

These pictures show three items that I keep out year round. By adding a few small touches I am able to create a totally different look!


My favorite transformation is my fireplace! With my first attempt I was going for a more minimalistic approach. I liked it at first , but then I stopped by Hobby Lobby and got some inspiration. Hobby Lobby has a way of doing that to me. As you can see most of the things that I used on the fireplace for summer I also used for fall with just a few changes. I love how it turned out!


